Showing posts with label Windows. Show all posts

Friday, 25 March 2016

How to Change Microsoft Office 2010 License Key

You go to activate Microsoft Office 2010 and you receive a message stating, “Your copy of Microsoft Office Professional Plus 2010 cannot be activated because the specified Product Key has already been activated the maximum number of times permitted for your software license as specified in the Microsoft Software License Terms.”


The solution is to change the product key to another product key. I will show you three different methods of changing the License Key
Method 1
Open “regedit”

Navigate the registry to: HKEY_LOCAL_MACHINE\SOFTWARE\Microsoft\Office\14.0\Registration\ and delete the whole “Registration” key located under the “14.0″ key
Right click “Registration”
Select “Delete”

Press “Yes”


Close Regedit, Restart an Office 2010 application. You should be prompted to reenter your License Key

Method 2
Open to Microsoft Word
Press “File”
Press “Help”
Select “Change Product Key” (this option was not here on my installation, I used Method 1)


Method 3
Click on Start Menu > Control Panel > Programs and Features (or Add/Remove Programs, depending on your operating system).
Click on your product, e.g. Microsoft Office Professional Plus 2010
Click “Change” on the top menu.


Select the option to “Enter a Product Key.”
Press “Continue”


Changing your Product Key
Once you complete one of the Methods listed above you should be able to change your Product Key
Enter the appropriate product key from the top of this page and click “Continue.”


Accept the agreement
Press “Continue”

Configuration will occur

Press “Close”

Select “I want to activate the software over the Internet (recommended)”
Press “Next”

Your product should activate successfully
Press “Close”


How To Use Pendrive As Ram In Windows XP 7 8 10

RAM means random access memory, the main memory of our device which execute each and every process performed. More our device has ram more the speed of run time. That means Ram is the only memory which took load of all the processes occur. Just like we run any application, music file, game all these things are run in temporary memory. If we run number of tasks at same time then you may face not responding problem. Because RAM, Paging and Cache memory is lesser that your current apps requirements. In that condition you need to increase your system ram. Its not possible for everyone to upgrade high grade ram. So the only best possible way for them is to use pendrive as ram.


How you Make Money Online 

How To Use Pendrive As Ram In Windows.


Method 1st:- Virtual Ram Concept For Windows XP, 7 and 8

  1. First of all insert your pendrive.
  2. Then open “My Computer” and right click >> Then open “Properties”.
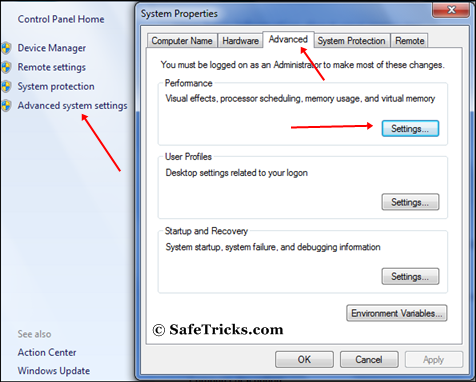
  3. Now Properties window will appear, then click on “Advanced system settings” from left side.
  4. Then in “Advanced” tab click on “Settings” button appear in “Performance tab”.
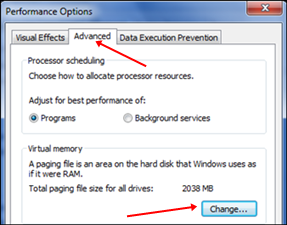
  5. Again new window will appear then click on “Advanced” tab.
  6. In advanced tab there is an option of “Virtual Memory box”, then click on “Change Button”.
windows system settings for virtual ramwindows performance option for virtual ram
Process Of Increasing Virtual Ram

  • After click change button “Virtual settings” will appear.
  • Now unchecked the box of  “Automatically Manage Page Size Feature”.
  • Then in custom  size add your Pendrive current same in below format. 
  • NOTE:- IF YOUR PEN DRIVE IS OF SIZE 4GB THEN ALWAYS ADD 10MB LESS FROM CURRENT AVAILABLE SIZE. AS I AM USING PEN DRIVE OF SIZE 4GB AND CURRENT SPACE AVAILABLE IS 3700 MB THEN USE 3690 MINIMUM APPROX OR REMOVE MORE AS YOU CAN BECAUSE IT BETTER OF DEVICE SAFETY.
    • Now add same “Value” in both boxes and click on apply button.
    • Restart your PC or Laptop and now pendrive will work as “Virtual Ram”.
    Important:- If you face problem in above method then can also follow below method which is easy to perform and work on Window 7, 8 and 10.

    Method 2nd:- Increase Ram Using ReadyBoost In Windows 7, 8, 10

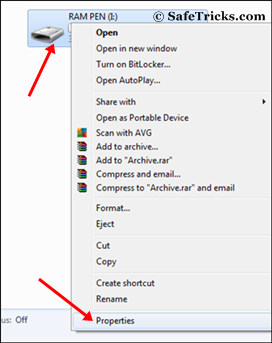
    • Firstly insert your “Pen Drive” >> Now right click on your pendrive.
    • Open “Properties” >> Then “ReadyBoost” tab.
    PenDrive Properties
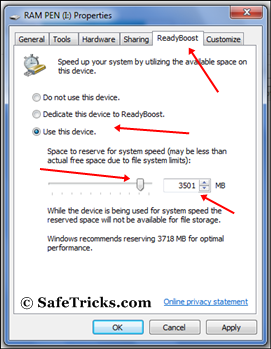
    •  Then switch to “Use this device” and reduce your current memory space. If your current device place is 3700MB then reduce it with approx 200-300MB.
    Pendrive Readyboost
    • Then click on Apply button and all Done.
    • In case if you want to change back your pendrive to normal. Then switch it back Don’t use device in Readyboost tab.

    Important Recommendations:-

    • Always safely eject your Pendrive. Direct removal may leads to device damage.
    • In Virtual Memory method, If you want to convert back your Pendrive into Normal. Then again open Virtual Settings and remove custom memory value and choose Default settings by checking “Automatically Manage Paging Size”.
    • In ReadyBoost method don’t forget to revert back to normal or otherwise open your pendrive and delete Readyboost file from your pendrive.
    So these best possible ways to use pendrive as ram in windows and I hope you find them helpful and knowledgeable. In case we missed anything please let us know.

Top 6 Best Screen Sharing Software For Windows PC – 2016

Remote desktop access is called controlling the another person’s PC or device through remote desktop connection. Remote desktop also refers to an software which allows the user to interact with another computer’s desktop and do anything through remote access. It is a client/server model in which there is one client PC which connects to the another client’s PC. With the help of host (called third party software) through the internet and you can manage or access the computer which are placed on different location far from you. Like if your any family person lives in different place which is far from you. They have some kind of software problem in their computer and wants your help. So you can help them with the help remote desktop & screen sharing software. While solving the problem you can feel that you are sitting in front of their PC.
Screen Sharing software let you all the authorities of another person computer, you can manage their computer files, programs and helping them to solve their problems without going out your friend’s home. Even screen recording softwareare useful to teach others. But Screen sharing software also help in business purposes for online meetings or sometimes you have to manage lots of computers in your company or solve your clients problem. So you cannot manage particular computer by  because it takes lots of time of yours to go to the particular computer and solves problem. But with the help of screen sharing software for PC you can get your access your clients PC and solve their problems by siting only at one place.

List Of Best Screen Sharing Software For PC.

#1 Team Viewer

Team Viewer is best, popular in all screen sharing software. Which helps you manage online meetings and can get access to your partner’s PC. It takes only few seconds to connect any PC or server. You can get access to your office computer from home or can also access your application and data. Team Viewer gives you different packages, for online meetings you can add up to 25 participants. you can boost your products sales by giving online presentations.
Team Viewer

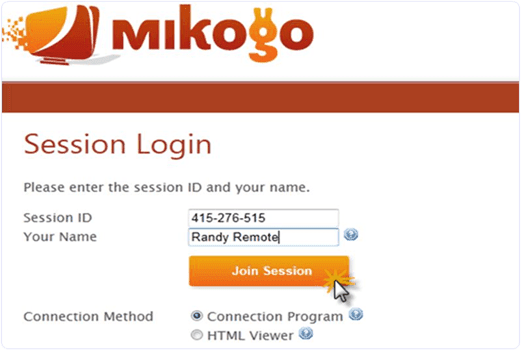
#2 Mikogo.

Mikogo is 100% browser based tool which helps to set up online meetings. It is free for non-commercial use and for business purposes provides different plans you can check on their website. Mikogo is an powerful and great online meeting software for set up online conferences and for online presentations. Large number of companies use mikogo for their business purposes. It is a cross platform software and you can set up meeting up to with 25 participants.
Mikogo

#3 Join.Me.

Join.me is an free, simple screen sharing software with the help of this you can manage online meeting and can share your partner’s screen. They have different plans for business user’s. For non-commercial use it is free. You can keep record of your meetings so you can share later with other participants. You can also download mobile app and take meetings where ever you are on road, on home etc.
Join.Me

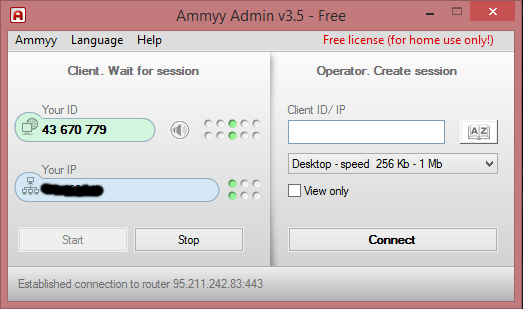
#4 Ammyy Admin.

Ammyy Admin is an easily way to share a remote desktop over the internet. You don’t have to download any software just download 0.5mb tiny exe file and click on it after open it fill session ID and password and you can connect with your partner’s computer. You can also voice chat with your partner and relatives or you can send and share large number of data through Ammyy Admin. It is a free software for remote desktop connection.
Ammyy Admin

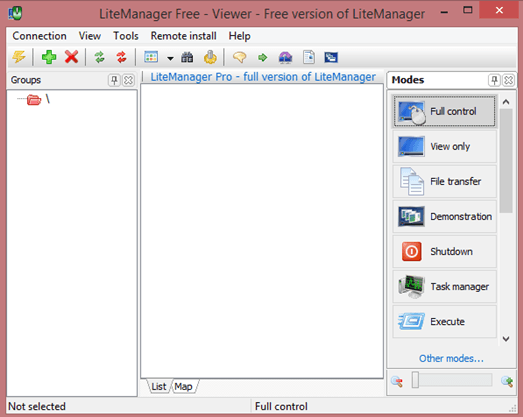
#5 LiteManager.

LiteManager is an remote access software which helps to connect with your partner’s computer and set up online meetings. In free version you can you can manage up to 30 computers. You can do tesxt chat, audio and video chat with your remote desktop. You can also download trial version for 30 days as well as free version for basic purposes. It is mainly designed for system administrators. It is a reliable, convenient and fast software and you can use easily.
LiteManager

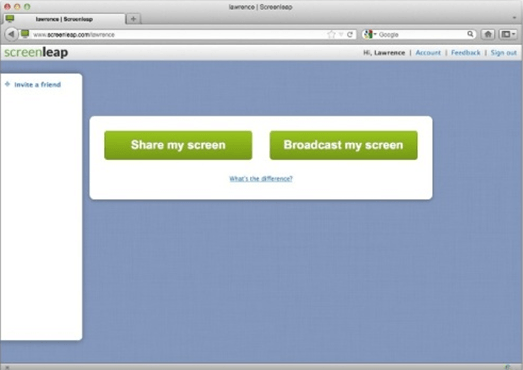
#6 Screenleap.

Screen leap is free and reliable software for screen sharing. For free use you can share your screen only 1/2 hours per day with maximum 8 participants. It is a quick and easy software just download it and create a session then fill session ID and password after it you can easily share your partner ID with in few seconds.
Screenleap
These are some best screen sharing software for PC. These are based on our research so if you have any best software for screen sharing which is missing in the list just leave your comment.

Thursday, 24 March 2016

Top Best Android Emulator For PC 2016 (Windows 7- 8 -10)

Android smartphones are widely used today. It becomes essential part for daily routine like we do internet surfing, Play songs, Videos, games and for using various Apps. Android is powerful operating system  based on Linux which runs on almost all Android Smartphones and tablets. Android mobile plays all functionality very well but mobiles with less hardware can’t give you the actual enjoy of games because of less graphic support and Ram. Some times it is costlier for anyone to buy a costly Android phone having latest features. For such situation the best solution is using best  android emulator for PC

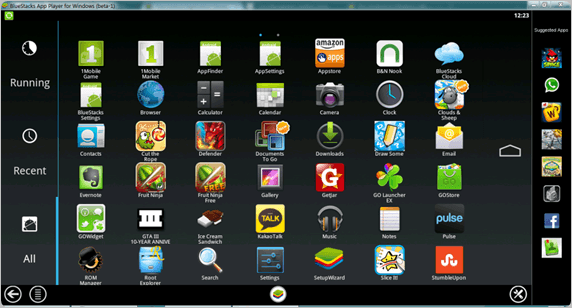
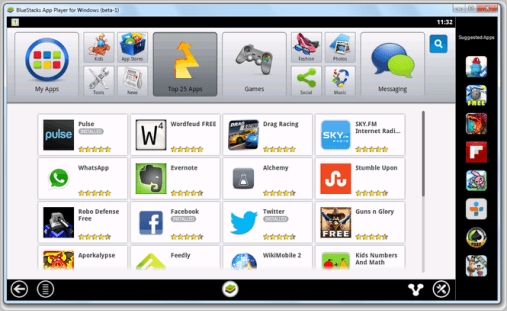
1. BlueStacks.

Bluestacks is widely used android emulator for PC. It does not required virtualbox support to create runtime environment for Android Apps. It provide easy one click installation and used in Windows 7, 8, 8.1 . It is free available. It Provide easily installation of Android Apps apk’s and third party apk’s. It can also be used to run IOS Apps on Mac and Windows. After the installation of blue stacks, you can search and download Android Apps to Run.

Blue-Stacks-emulator

2. GenyMotion.

GenyMotion is another Android Emulator for PC to run apps and games. Once you install GenyMotion it also install oracle virtual box side-wise to create Runtime Environment for Android Apps. It is also freely available. It provide you the full Android experience. It also provide the feature to choose from many Android Smartphones and tablets and enjoy its features. It is mainly used by developers to test their Apps.
Geny-motion-emulator

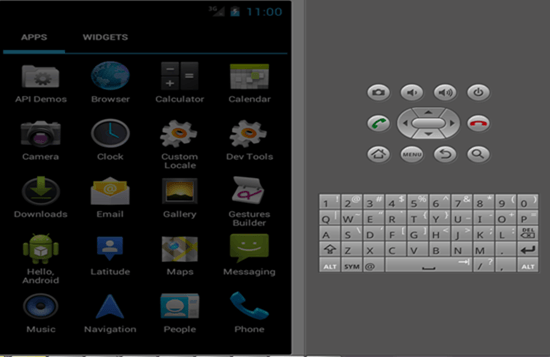
3. Native Android Emulator.

Native emulator is another popularly used Android Emulator for windows PC. It provide the user with the interface of an Android mobile. The user can install any Apps of  choice and run it on the emulator.This Emulator comes with Google development kit. It is available for Windows and Mac. After its installation we simply need to download the Apps apk’s we want to use. It offer high performance and quite simple interface of selected Android phone.
native-emulator
4. YouWave.
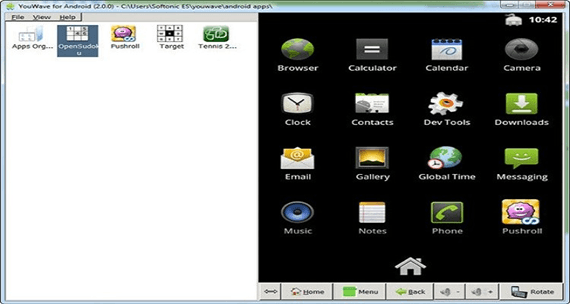
YouWave Emulator is another popular Android emulator for PC. It is the combination of BlueStacks and Native emulator. It provide the user with two screen parts. The left part of screen shows the installed applications and the right part shows the view of your mobile screen. It is not freely available and offer 10 days trail in its free version. It only support the 4.0 jelly Bean of Android version. It also depends on virtualbox for runtime environment.
You-wave-emulator

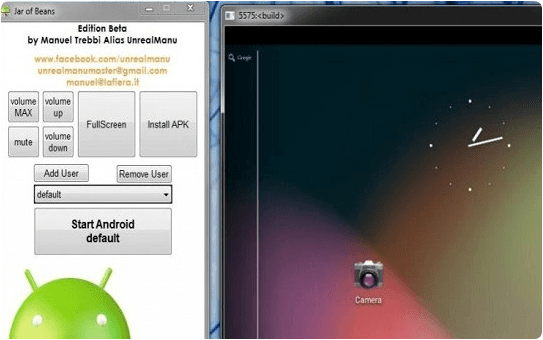
5. Jar Of Beans.

Jar of Beans is developed only for Android jelly Bean version as it is clear from its name. It is available on its official website for free. Once we install this we only need to download the apk’s of the application we want to install. Jar Of Bean is available for all versions of Windows and interface is quite user friendly and offer high performance.
jar-of-beans-emulators

6. Windroy.

Windroy is one of the most commonly used android emulator for Windows PC as it is clear from its name. One of its important features is that it works completely using Windows Kernal. Another important feature is that it does not require virtualbox support to create runtime environment for Android Apps and is very light weight. If you do not want to install virtualbox then you should use it.
windroy-emulators

7. Andyroid.

Andyroid is another best android emulator for PC Windows 7, 8, 10. It has some special features like use your phone asremote while game, ARM support, also you can direct download Apps from your host Operating System. It also require virtual box support to Android Apps.
andyroid-emulator
So above given are the best android emulator for PC which let you to run android apps easily on you windows. If you know any of the best android emulator which is missing, don’t forget to share in comments.

How To Create Wifi Hotspot In Windows Laptop Or PC

As we all know 21st century is an era of Internet. An Internet is a fast growing technology which provides every information in all over the world, you have to just search it on internet and you can find  information  related on any topic. With the increasing of new technologies Mobile phones, tablets are also growing very fast within the few decades. If you have a WiFi enable mobile phone, Tablet or an Ipad then you can easily connect your devices to available WiFi network in the public place, office or in the college, but in the home mostly people have only single connection (wired internet connections) or have not  WiFi router. Don’t worry, you can also connect your devices with your internet without any help of WiFi router. You have to just create an WiFi hotspot connection in your PC or Laptop. To Create WiFi Hotspot in Windows is not a very difficult task. You can easily create WiFi hotspot in your windows PC or Laptop by just doing simple steps which we discuss below.

Method 1:- How To Create WiFi Hotspot With Software.

In this method firstly you have to download software. After installing the software it will tell you creating your WiFi Hotspot username and password. Simply just create username and password according to you. Then click on start or activate button it will automatically create to you WiFi Hotspot, next whenever any user want to access your WiFi hotspot they have to put password first which is provided by you then they can access your WiFi hotspot network. So its just simple method and you can easily create a WiFi hotspot access point on your windows 7/8/8.1 PC or Laptop and you do not have to use any WiFi router.  So here we provide two software’s which is best and free for creating WiFi Hotspot on you PC or Laptop.

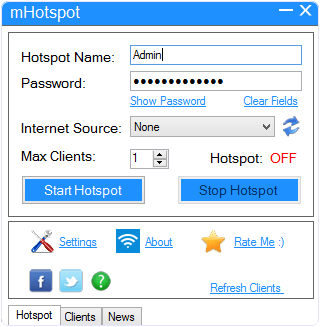
#1 mhotspot.
mHotspot is an free and easy method to create WiFi Hotspots with WiFi enable windows 7/8/8.1 on PC or Laptop. This software converts your computer or laptop windows into virtual WiFi router which can connect upto 10 devices. You can also share any type of internet connection including 3G/4G, LAN and Ethernet with the fully secured connection.
mHotspot
  • It is easy to use.
  • Security Features:- WPS, WPA2 and WEP password security.
  • The mHotspot also shows the number of devices connected, you can see sent and received data, and other log data.
OR USE
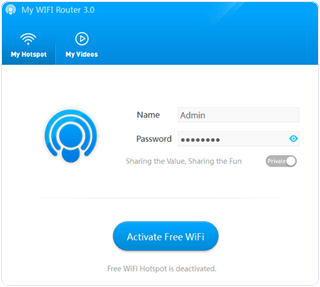
My WiFi router is another free software which converts your windows 7 & 8 PC/Laptop into WiFi hotspots. You can share the internet easily with My WiFi router software anywhere and anytime. Just download and install the software and place a your username and password according to you and click on activate button.
My WiFi Router
  • It is easy to create a secure WiFi hotspot with My WiFi router.
  • Share internet any kind of internet connection (3G/4G, Ethernet & LAN).
  • You can display and manage the connected devices(limit internet speed, blocklist).
  • You can extend your WiFi range.
Note:- Those who have desktop PC they have to first buy Bluetooth device then they will be able to create WiFi hotspot either they will not be able to create.

Method 2:- How To Create WiFi Hotspot With CMD.

In this method we will explain you that how to create WiFi hotspot in windows 7/8/8.1 PC or Laptop through command prompt. These are the simple steps to create WiFi hotspot.

Step 1:- Enable the Microsoft Virtual WiFi Miniport Adaptor.

  • To enable this first open “RUN” dialogue box using (“Window Key”+”R”).
  • After open the Run dialogue box type in it “cmd”. It will open your command prompt or in case you are not able to find by this way simply search at start for cmd you will easily get.
  • Run the command prompt under Administrator privileges by doing right click on cmd and select  (Run as Administrator) .
  • Once the command prompt open type in the below given command.
NETSH WLAN SET HOSTEDNETWORK MODE=ALLOW SSID=HOTSPOT KEY=PASSWORD 
command to create WiFi hotspot in windows PC or laptop
#1 SSID is your username that will show on the connection.
#2 Key is the password of your WiFi Hotspot connection.
#3 You can also create SSID and Key accroding to you !.

Step 2:- Starting WiFi Hotspot Connection.

  • After creating Hosted Network next you have to start it.
  • For starting WiFi hotspot connection, type in the command prompt given below command.
NETSH WLAN START HOSTED NETWORK
command to create WiFi hotspot in windows PC or laptop

Step 3:- Configuring Microsoft Virtual WiFi Miniport Adapter.

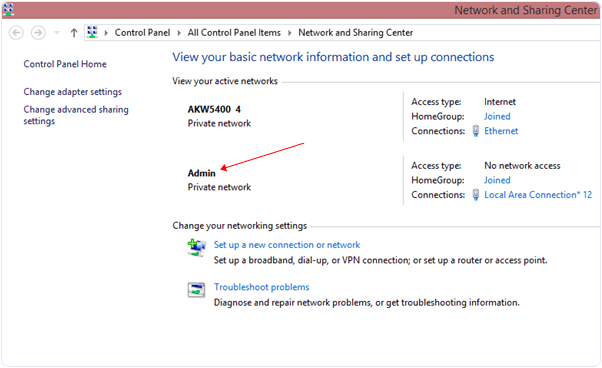
  • Go to Network and Sharing Center where you will see your created network.
  • Next go to right side and you will see change adapter setting click on it.
windows network and sharing
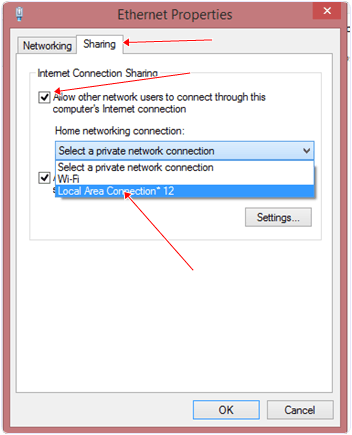
  • Then click on the Ethernet >> Properties.
ethernet properties
  • It will show you new dialogue box. Click on Sharing >> Tick on Allow network user. As show in the given image.
  • Select Local Area Connection*12 which we created.
  • And then click ok.
ethernet properties for wifi hotspot

Some Other Commands.

  • If you want to stop network connection then simply open your command prompt under administrator privileges and type below give command.
NETSH WLAN STOP HOSTEDNETWORK 
  • Or if you want to change your network Password then type below given command in the command prompt.
NETSH WLAN REFRESH HOSTEDNETWORKYOURNEWPASSWORD
Back to Top